How to set up GetResponse Chats?
To access chats:
- Go to Chats.
- When you first open the Chats page, we’ll show you an onboarding explaining the main features. Click Let’s go to proceed with the onboarding. Click Skip the tour to access the settings.

If you want to set up chats after the onboarding:
- Go to Chats.
- Click on Settings.

- Click on each tab to customize a given setting.
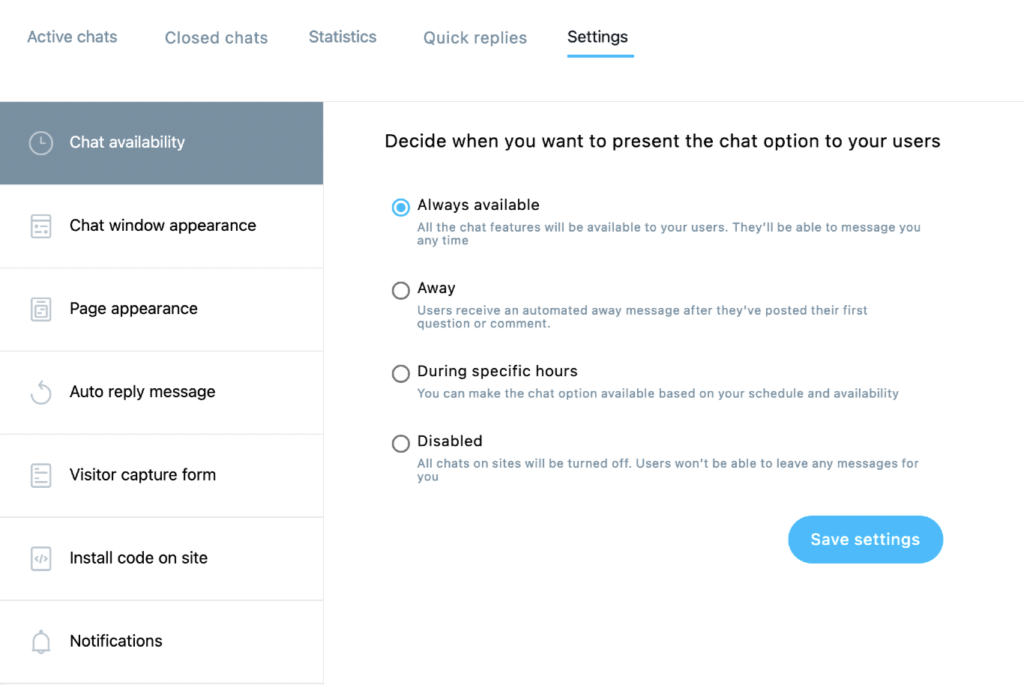
Chat availability
Chat availability allows you to decide when you want to present the chat option to users.
You can choose from one of the options:
- Always available – the chat feature is always enabled and your contacts can message you anytime.
- Away – contacts receive an auto reply message after they send their first message in the chat. You can customize the message in the Auto reply message section of the settings.
- During specific hours – set up specific times when you will be available for chatting. You can add different days and hours to create a schedule of the chats availability. When you’re offline, people will get the auto reply message as if the chats were set to Away. The hours are set according to your account timezone.
- Disabled – turns off the chat feature from all pages.
Once you customize your chat availability, click Save settings.
When you disable chats, the chat button will disappear from the landing pages it was previously enabled on. We’ll display a notification on the hosted chat page that the chats have been disabled. You can set up a message that will display on the chat page when the chats aren’t available.
Chat window appearance
Chat window appearance lets you customize your welcome message and set the look of the chat window.
To customize chat window appearance:
- Change the Welcome title. Invite people to chat with you. Use 20 characters or less.
- Set Status message. You can choose from Available and Away. Use the default text for both options or provide a custom one. You can use up to 60 characters.
- Set the Main chat color.
- Set the Text color.
- Add your Logo (avatar). Show people who they’re talking to. Add your photo or a company logo.
- Select the Chat button. We’ll display the button on each landing page that has GetResponse Chats enabled.
- Choose if you want to Display welcome title on button. It helps you prompt your visitors to start a chat.
- Choose the button position. You can choose either Left corner or Right corner.
- Set the language of the default window elements, such as tooltips and field names.
Once ready, click Save settings.
Auto-reply message
You can set up your auto reply message when you’re away from chats or outside of your working schedule.
To set the auto reply message:
- Provide your Away message. Use up to 100 characters.
- (Optional) Switch the auto-reply message to be displayed if you don’t reply after a specified time. For example, if you don’t reply to the first message after 2 minutes, even though the chats are enabled, we will post the auto-reply after this time.
Click Save settings to continue.
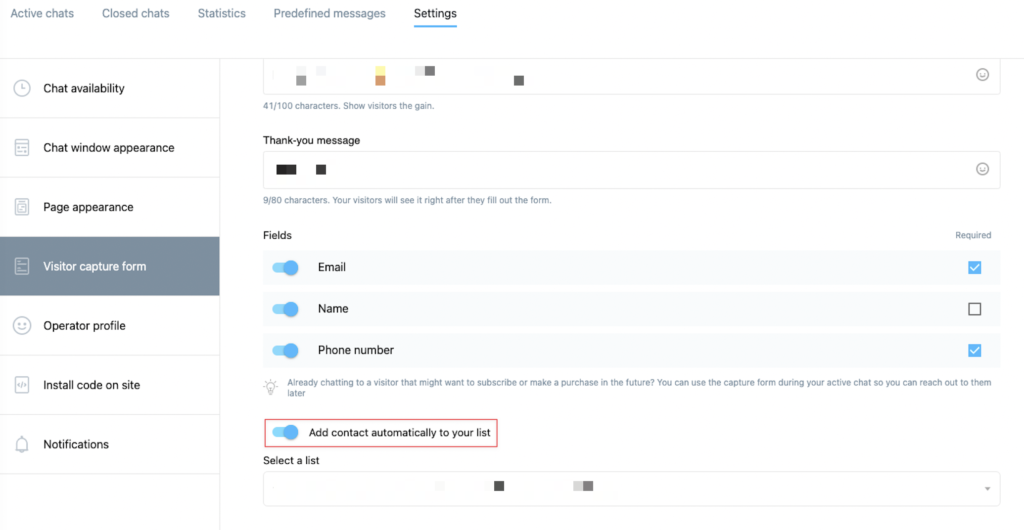
Visitor capture form
Visitor capture form lets you ask chat visitors for their contact information to follow up with them later. You can collect the contact’s email address (required), phone number (optional), and name (optional).
To set up visitor capture form:
- Select when your capture form should be sent.
- Always – visitor capture form is sent automatically after someone’s first message on chat.
- Only in Away mode – visitor capture form will appear after the auto-reply message when your chats are set to Away or outside your schedule. When your chats are set to Away mode or outside your schedule, we will first send your auto-reply message and then the visitor capture form.
- Never – the capture form is never sent automatically.
- In the Message field, provide the message you want to appear above the capture form.
- In the Thank-you message field, type in the message you want to display after the contact has filled out the capture form.
- Enable the custom fields that your visitor capture form should have. You can choose Email, Name, and Phone number custom fields. Check the box next to a given custom field to make it required.
- Click Save settings.
The capture form is optional. It’s not necessary to fill out the form to continue the chat. Contact’s data will be stored on the Chats manage page. You will also be able to add visitors who submit a capture form to one of your lists.
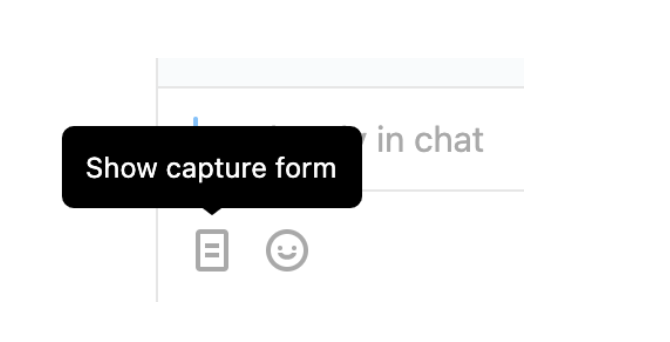
You can manually send the capture form during the chat. Click the visitor capture form icon in the chat window to send it:
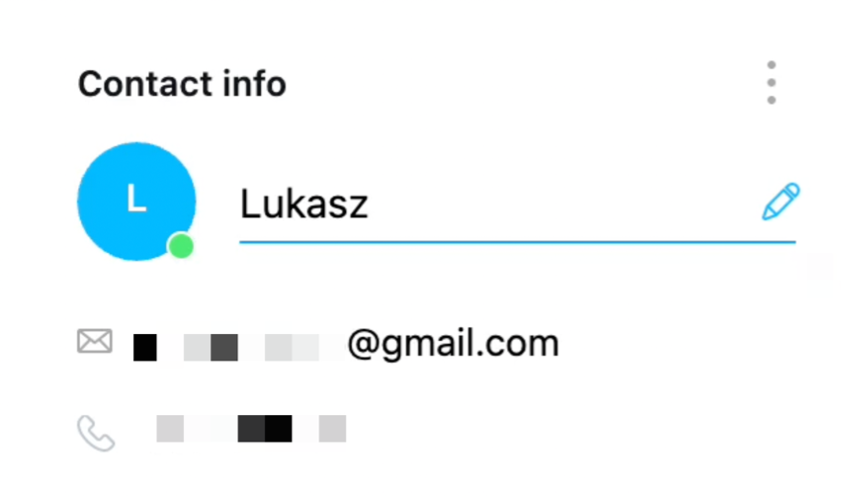
Once someone fills out the capture form, the option to send it will disappear. You’ll see the contact’s details under the Contact info section and in the chat window. You’ll be able to edit the Name, Email, and Phone number fields. Click on a given field and type your text to update. The data will only be updated in GetResponse Chats, and not in the list.
You can choose to add any visitor who enters their details into the capture form to a specific list. Enable this option in Settings > Visitor capture form > Add contact automatically to your list.
Operator profile
The operator profile section allows you to set your avatar that will be displayed next to your messages in the chat window. The avatar will be visible for other operators and chat visitors. The avatar will also be visible in operator filters.
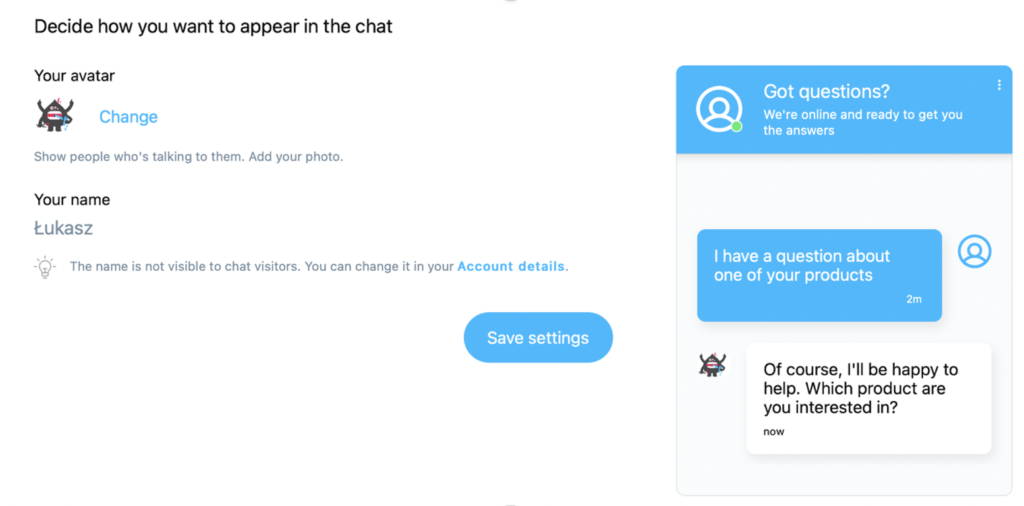
To add your avatar
- Click on Change under Your avatar.

- A window will open for you to select an image from your device.
- Once you choose your image, click on Save settings.
To change operator’s name
The operator’s name can be changed by the account administrator only.
- Click on Account details.
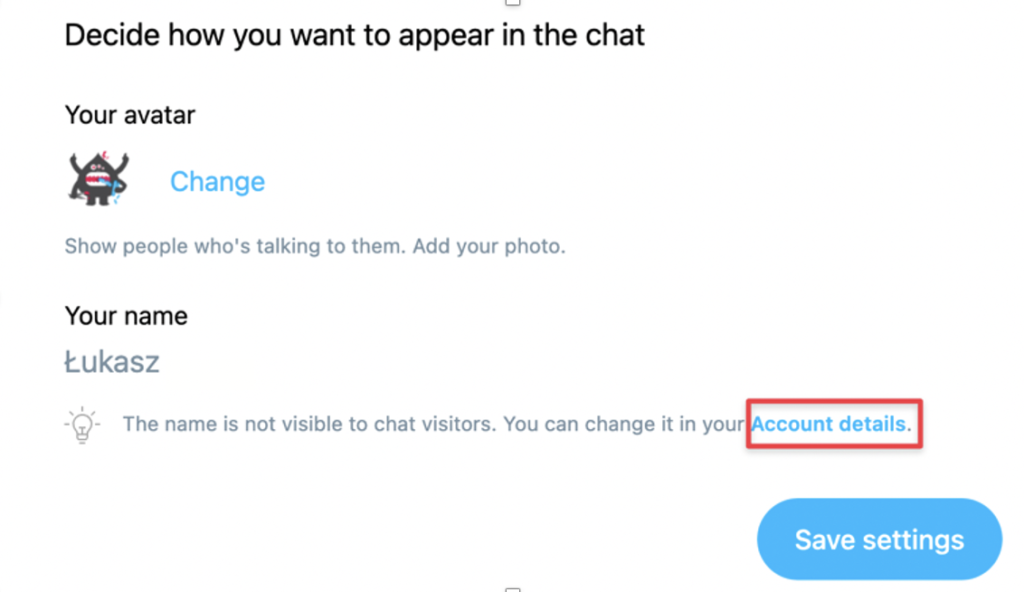
- You’ll be taken to the Account details page where you’ll be able to change the displayed name.
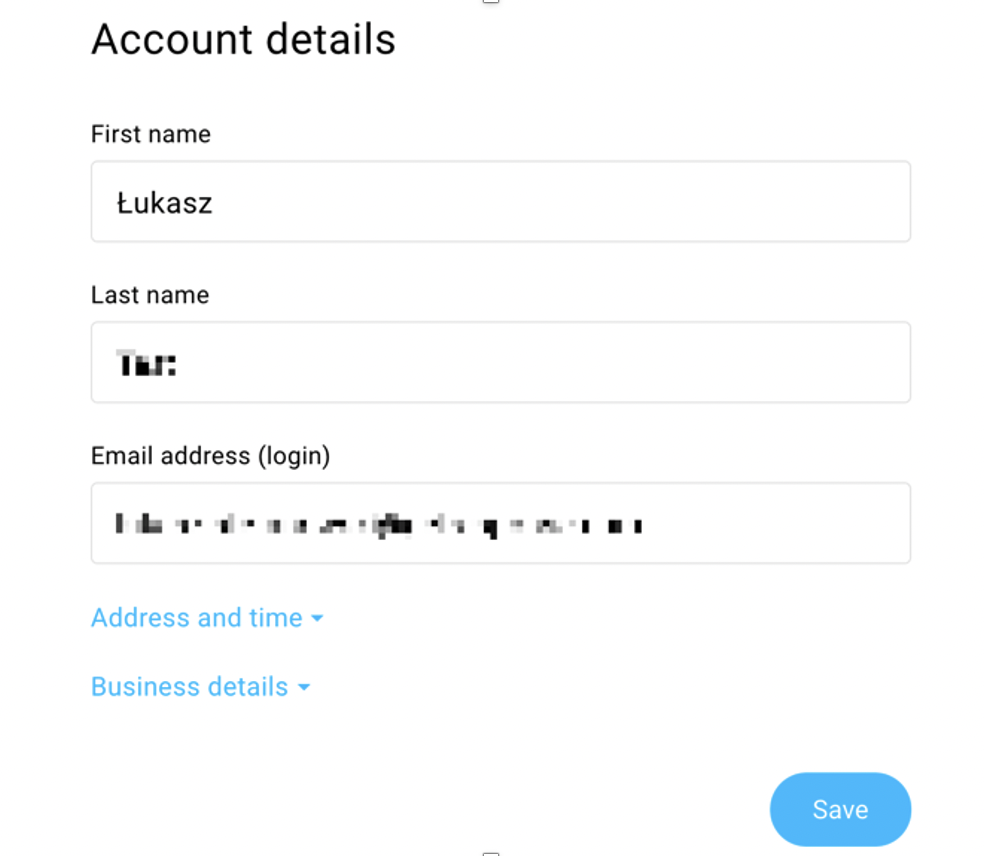
- Click on Save once you’ve changed the name.
Install code on site
You can also add the chat window to your own website. See how to install the GetResponse Chats code on your site.
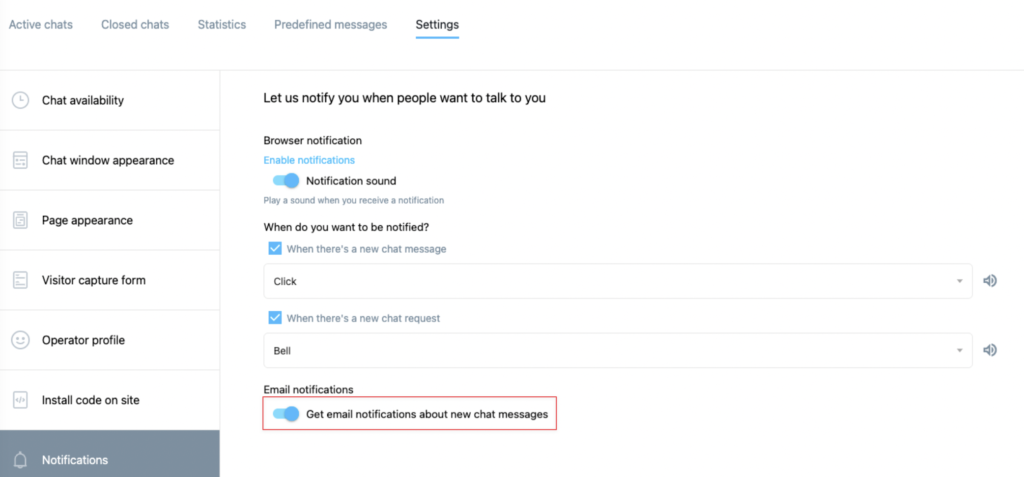
Browser notifications
You can enable notifications to avoid missing a chat.
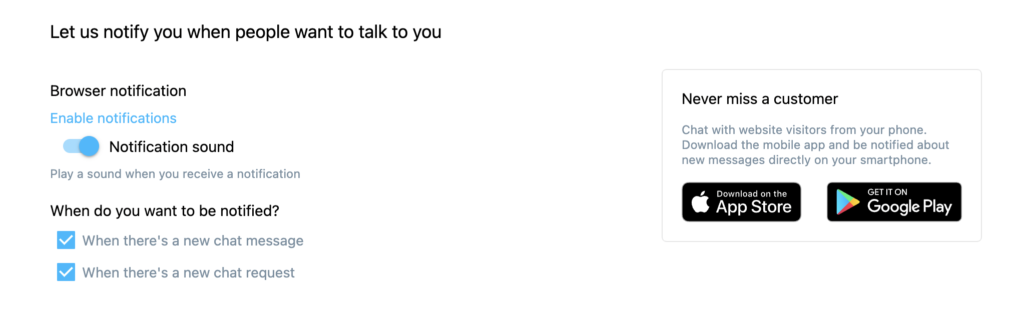
- Click Enable notifications to start receiving them in your browser. Notifications are enabled for each browser separately. If you want to receive them on a different device or browser, make sure to go to settings again and enable them.
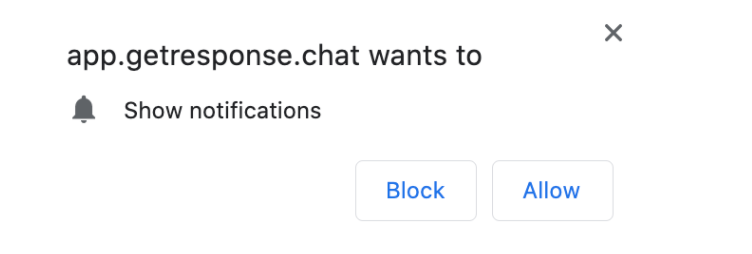
- Confirm in your browser that you allow showing notifications.
- Enable the Notification sound toggle to receive sound notifications.
- Select if you want to be notified when there’s a new chat message.
- Select if you want to be notified when there’s a new chat request.
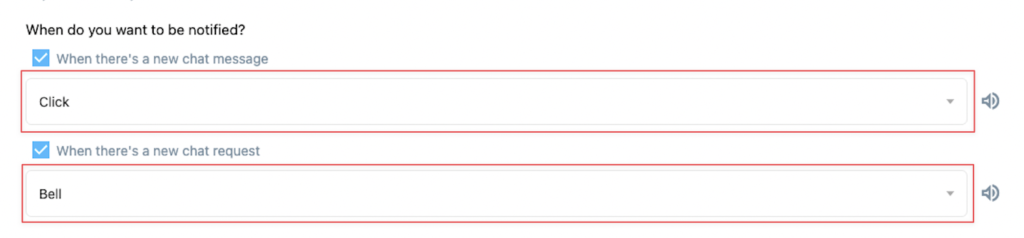
You can choose different sounds for chat messages and chat request. Click on these fields to select the sounds:
You also have the option to download the chat app to your mobile phone (Android or iOS).
Click Save settings to finish the setup.
Email notifications
Email notifications can be sent when the host doesn’t read a new conversation within 2 minutes. To receive notifications about a new conversation, enable this option in Settings > Notifications > Email notifications.